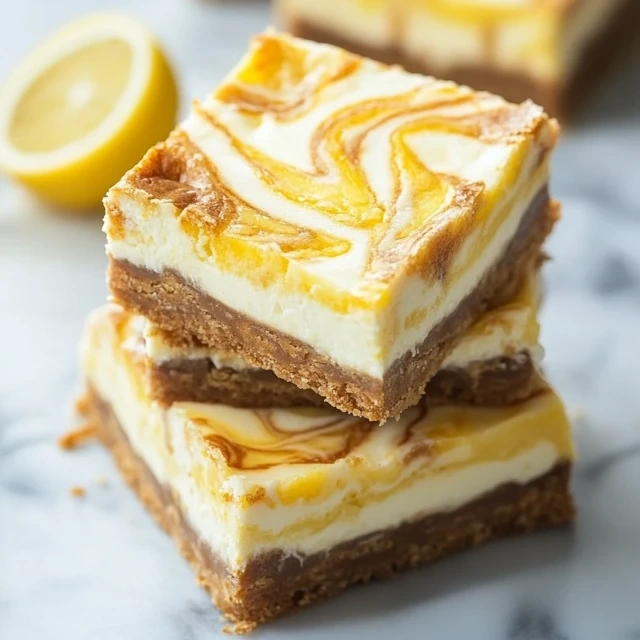
Imagine biting into a dessert that combines creamy richness with a bright citrus tang. These lemon marbled cheesecake bars are more than just a sweet treat. They turn an ordinary moment into something truly special.
These tangy lemon bars are a modern twist on classic desserts. Each slice is a story of balanced flavors. The crumbly graham cracker crust, velvety cheesecake, and vibrant lemon marbled topping all come together beautifully.
These lemon marbled cheesecake bars are perfect for both new and experienced bakers. They promise a delightful experience that’s both stunning to look at and incredibly tasty.
Key Takeaways
- Three distinct layers of flavor and texture
- Perfect balance of sweet and tangy notes
- Easy to prepare with professional-looking results
- Ideal for spring and summer gatherings
- Customizable with various citrus variations
What Makes These Lemon Marbled Cheesecake Bars Special
Explore a world of cream cheese desserts that will change your baking. These lemon marbled cheesecake recipes are more than just desserts. They are a journey of flavors and presentation.
Lush, creamy lemon marbled cheesecake bars with a buttery graham cracker crust, captured in soft, natural lighting. Thick swirls of tangy lemon zest and vibrant yellow custard create a beautiful marbled pattern across the top, inviting the viewer to imagine the rich, decadent texture. The bars are arranged artfully on a white ceramic platter, allowing the delicate colors and textures to shine. Shadows fall softly, highlighting the grooves and layers of the dessert. An appetizing, close-up shot captures the details of the luscious filling and flaky crust, making the viewer’s mouth water with anticipation of this citrusy, indulgent treat.
Your taste buds will experience something amazing. These bars mix complex and simple flavors. They offer a unique twist on classic desserts, with layers of taste in every bite.
Perfect Balance of Sweet and Tart
The magic of these bars is in their flavor. Sweet cream cheese meets zesty lemon for a perfect mix. This blend makes each bite both rich and refreshing.
- Creamy cheesecake base
- Vibrant lemon curd
- Delicate marbling technique
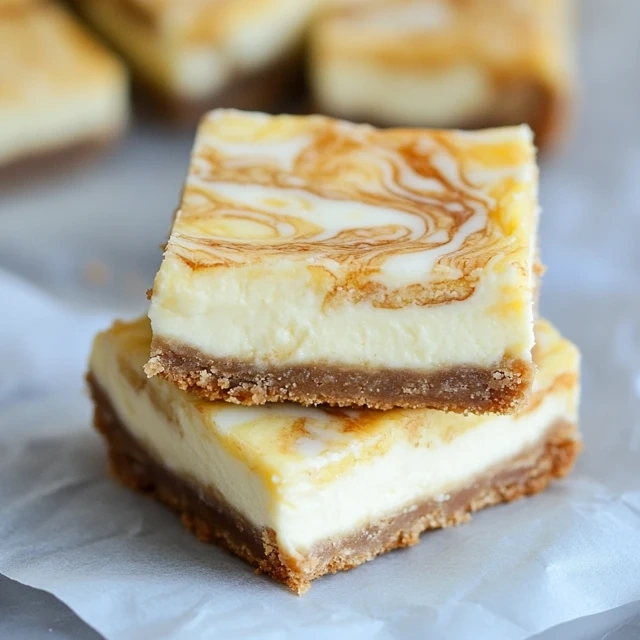
Three Delightful Layers
These bars have three layers that work well together:
- Graham cracker crust – A crisp base
- Cream cheese layer – A smooth middle
- Lemon curd topping – A bright finish
Easier Than Traditional Cheesecake
These bars are easier to make than traditional cheesecakes. You’ll spend less time baking and more time enjoying a beautiful dessert. It looks like it came from a pro bakery.
| Preparation Time | Baking Time | Serving Size |
|---|---|---|
| 20 minutes | 1 hour 2 minutes | 12 servings |
With a few simple steps, you can make these impressive desserts. They are sure to impress your family and friends.
Essential Ingredients for Perfect Citrus Bars
Making delicious lemon dessert bars needs the right ingredients. Each one plays a key role in the taste. Start your citrus sweets journey by knowing what each ingredient does.
A bountiful arrangement of fresh lemon slices, juicy wedges, and glistening zest, neatly displayed on a crisp white background. In the foreground, a selection of essential baking ingredients – powdered sugar, flour, eggs, and a pat of butter – arranged with care, hinting at the delectable lemon bars to come. The soft, even lighting creates a sense of simplicity and elegance, drawing the eye to the vibrant colors and textures of the citrus fruits and pantry staples. The overall composition evokes a sense of anticipation, inviting the viewer to imagine the tangy, sweet flavors of the perfect lemon dessert bars.
For your lemon marbled cheesecake bars, you’ll need two main parts: the graham cracker crust and the creamy cheesecake filling. Let’s look at what you’ll need:
Graham Cracker Crust Ingredients
- 1½ cups graham cracker crumbs
- ¼ cup granulated sugar
- ½ cup melted butter
Cheesecake Filling Ingredients
- 16 ounces cream cheese (2 bricks)
- ¾ cup granulated sugar
- 2 large eggs
- ½ cup sour cream
- 3 tablespoons fresh lemon zest
- ¼ cup freshly squeezed lemon juice
- 1 teaspoon vanilla extract
Choose fresh, top-quality ingredients for your citrus sweets. Fresh lemons give the best flavor. Make sure all ingredients are at room temperature for smooth mixing and texture.
Pro tip: Use full-fat cream cheese for the creamiest cheesecake layer. The mix of cream cheese, eggs, and sour cream makes a rich base. It’s perfect with the bright lemon flavor.
Creating the Perfect Graham Cracker Crust
The base of a great easy baked cheesecake is its crust. For marbled cheesecake squares, a graham cracker crust is perfect. It’s crispy and complements the creamy filling well.
Crust Preparation Tips
Making the ideal graham cracker crust needs precision and care. Start by picking high-quality graham crackers. About 10 whole crackers make 1¼ cups of fine crumbs. Here are some key tips:
- Crush crackers into uniform, fine crumbs
- Use 1 tablespoon of granulated sugar
- Combine with 3 tablespoons of melted unsalted butter
- Press mixture gently into a 9×13-inch baking pan
Baking Temperature and Time
The perfect crust needs careful baking. Heat your oven to 375°F. Bake the crust for exactly 10 minutes. This makes a golden, crisp base for your marbled cheesecake squares.
| Crust Element | Measurement | Preparation Detail |
|---|---|---|
| Graham Crackers | 10 whole crackers | Finely crushed |
| Sugar | 1 tablespoon | Granulated |
| Butter | 3 tablespoons | Unsalted, melted |
| Baking Temperature | 375°F | 10 minutes |
Alternative Crust Options
Looking for something different? Try these tasty alternatives to traditional graham cracker crusts:
- Oreo cookie crust for a chocolate twist
- Gluten-free graham cracker alternative
- Almond meal crust for low-carb options
Mastering the Creamy Cheesecake Layer
Making the perfect cream cheese desserts needs precision and care. The creamy layer is the heart of your easy baked cheesecake. Start by taking the cream cheese out of the fridge 30 minutes before mixing. This ensures it gets to room temperature.
Key ingredients for your cheesecake layer include:
- 1 (8-ounce) package cream cheese
- ¼ cup granulated sugar
- ¼ cup sour cream
- 1 large egg
- Lemon zest from 1 large lemon
- 3 tablespoons lemon juice
- 1 teaspoon vanilla extract
When making the cream cheese mixture, use a hand mixer on medium speed. Beat the softened cream cheese and sour cream until completely smooth. This usually takes about 2 minutes. Then, add powdered sugar, lemon zest, lemon juice, and vanilla extract while mixing.
Pro tips for achieving the perfect texture:
- Ensure all ingredients are at room temperature
- Mix on medium speed to incorporate air
- Avoid overmixing to prevent a dense texture
- Scrape down the sides of the bowl frequently
Your goal is a light, fluffy cheesecake layer that melts in your mouth. The lemon zest and vanilla extract add a delightful flavor. They create a sweet and tangy balance.
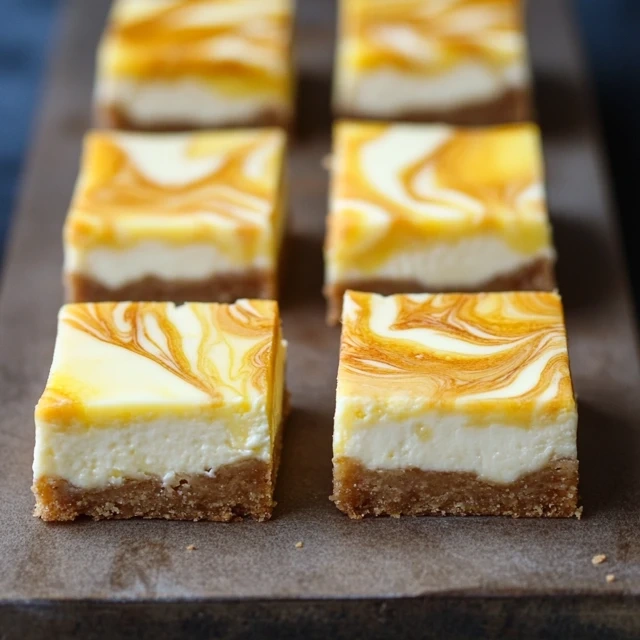
The Art of Lemon Curd Marbling
Creating stunning marbled cheesecake recipes needs precision and creativity. Lemon marbled cheesecake bars offer a delightful visual and flavor experience. They turn an ordinary dessert into an extraordinary treat.
Mastering the art of marbling involves understanding the delicate balance between your cheesecake base and lemon curd. The goal is to create beautiful, intricate patterns without disrupting the smooth cheesecake surface.
Swirling Techniques
When creating your lemon marbled cheesecake bars, follow these essential swirling techniques:
- Use a clean spatula or toothpick for marbling
- Pour lemon curd gently over the cheesecake layer
- Start from the center and move outward in circular motions
- Avoid deep cuts into the cheesecake base
Pattern Creation Tips
Experiment with different marbling styles to make your lemon marbled cheesecake bars unique:
- Create figure-eight patterns
- Try concentric circles
- Develop zigzag designs
- Practice gentle, light-handed movements
Common Marbling Mistakes
Prevent potential issues when marbling your cheesecake bars by avoiding these common mistakes:
- Overworking the surface
- Using cold lemon curd
- Applying too much pressure
- Mixing colors excessively
With practice, you’ll develop the skill to create beautiful, professional-looking lemon marbled cheesecake bars. They are as delightful to look at as they are to eat.
Tips for Achieving the Perfect Texture
Making lemon cheesecake bites with a perfect texture needs careful attention. The secret to great tangy lemon bars is balancing baking techniques and how ingredients mix.
Here are key tips for enhancing texture in your lemon cheesecake bites:
- Ingredient Temperature: Make sure cream cheese and eggs are room temperature for smooth mixing
- Use Greek yogurt to add creaminess and avoid a dense texture
- Mix ingredients gently to avoid too much air
The baking process is key for the right texture. Your tangy lemon bars should have a special texture:
- Bake at 325°F to avoid overheating
- Check for a slight jiggle in the center when you take them out of the oven
- Let bars cool slowly at room temperature
Cooling is also crucial for texture. Refrigerate your lemon cheesecake bites for at least 4 hours. This lets the filling firm up and become silky smooth, melting in your mouth.
Pro tip: Slice bars when they’re fully chilled for clean, precise cuts. This shows off the beautiful marbled texture of your dessert.
Customization Options and Flavor Variations
Get ready to give your lemon dessert bars a fun makeover! Trying out different customization options can turn these treats into something truly special. This recipe is all about being flexible and letting your creativity shine.
Alternative Citrus Options
Try new flavors by swapping out the lemon:
- Lime: Use fresh lime zest for a tropical twist
- Orange: Add orange zest for a sweeter taste
- Grapefruit: Mix in grapefruit juice for a complex flavor
Seasonal Adaptations
Make your lemon dessert bars match the season:
- Summer: Top with fresh berries like raspberries or strawberries
- Fall: Sprinkle warm spices like cinnamon or nutmeg into the crust
- Winter: Add white chocolate chips for a rich, festive touch
Garnishing Ideas
Enhance your citrus sweets with these beautiful garnishes:
- Candied lemon peels
- Edible flower petals
- Dusting of powdered sugar
- Chocolate drizzle
Remember, when trying new things, keep the core recipe’s balance. This ensures your cheesecake bars stay perfect in texture and taste.
Storage and Make-Ahead Instructions
Making delicious no-bake lemon treats means knowing how to store them right. This keeps their amazing taste and texture. Your lemon cheesecake bites will stay fresh with the right care.
Storing your lemon cheesecake bites is easy. Just follow these key steps to keep your dessert tasty:
- Refrigerate in an airtight container
- Keep bars separated with parchment paper
- Store for up to 4-5 days in the refrigerator
- Freeze for extended preservation
Freezing your no-bake lemon treats needs some prep. Wrap each lemon cheesecake bite in plastic wrap. Then, put them in a freezer-safe container. They’ll stay great for up to 3 months.
| Storage Method | Duration | Recommendation |
|---|---|---|
| Refrigerator | 4-5 days | Use airtight container |
| Freezer | Up to 3 months | Wrap individually |
When you’re ready to serve, thaw frozen lemon cheesecake bites in the fridge overnight. For the best taste and texture, eat them within 24 hours of thawing.
Pro tip: Make your lemon cheesecake bites 1-2 days before your event. This makes things easier and lets the flavors grow.
Troubleshooting Common Issues
Creating marbled cheesecake squares can sometimes present challenges. Don’t worry – most issues have simple solutions that can help you achieve the perfect dessert every time.
Cracks in your easy baked cheesecake can be frustrating, but they’re often preventable. Temperature plays a crucial role in creating smooth marbled cheesecake squares. Here are some key troubleshooting tips:
- Prevent Cracks: Always use room temperature ingredients to ensure a smooth batter
- Avoid overmixing the cheesecake filling, which can incorporate too much air
- Bake at a consistent 350ºF for 45-55 minutes
- Consider using a water bath to reduce crack occurrence by up to 50%
Marbling techniques can be tricky for beginners. If your lemon swirls aren’t perfect, try these tips:
- Use a toothpick or thin knife for precise swirling
- Add lemon curd in small dollops before creating patterns
- Work quickly to prevent the layers from setting
Crust issues are common in easy baked cheesecake. To avoid a soggy bottom, ensure your graham cracker crust is fully baked before adding the filling. Interestingly, letting the warm crust cool slightly can actually help the cheesecake layer spread more evenly.
Storage is critical for maintaining your marbled cheesecake squares. The dessert can be refrigerated for up to 5 days, with the ideal serving temperature being slightly chilled. Pro tip: If you’re preparing in advance, these bars can be frozen for 6-8 months without losing their delightful texture.
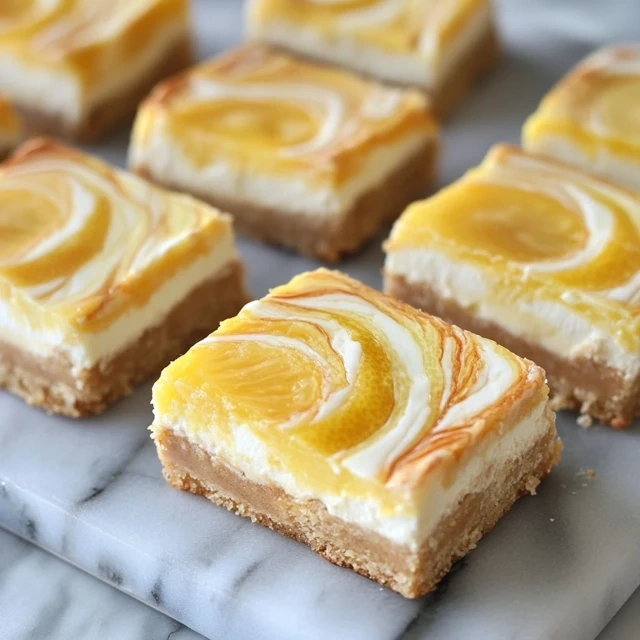
Serving Suggestions and Presentation Ideas
Your lemon cheesecake bites need a stunning presentation to show off their flavor. Making these treats memorable requires creativity and detail.
Here are some ideas to make your lemon dessert bars stand out:
- Create an elegant dessert platter with your lemon cheesecake bites as the star
- Garnish with fresh berries like raspberries or blueberries for color contrast
- Drizzle a light homemade lemon curd over the bars for extra zesty flavor
- Add a dollop of whipped cream with a mint leaf for sophistication
Think about how your lemon cheesecake bites will look. Cut them into uniform pieces using a warm knife for clean edges. A tiered cake stand can turn your dessert into an impressive display that will impress your guests.
Pairing drinks with your lemon dessert bars can enhance their flavor. Try serving with:
- Chilled Riesling to complement the citrus notes
- Light cappuccino for a creamy contrast
- Sparkling water with a lemon twist
Pro tip: Chill your lemon cheesecake bites for at least two hours before serving. This ensures the perfect texture and flavor.
Conclusion
Lemon marbled cheesecake bars are more than just a sweet treat. They are a journey of flavors that turns simple ingredients into something amazing. By learning to make these tangy lemon bars, you open up a world of taste that will wow everyone.
Your kitchen becomes a place where old and new meet. Every time you make these bars, you learn something new. This makes your dessert truly special, no matter if you’re new to baking or have been doing it for years.
Baking is all about patience and love. With each batch, you get better at making the crust and the marbled swirls. Soon, you’ll know how all the ingredients work together, making your dessert unforgettable.
Enjoy baking and add your own special touches. Share these tasty lemon bars with your loved ones. Your baking journey is just starting, and you’re in for a treat with every bite.
FAQ
How long can I store Lemon Marbled Cheesecake Bars?
Store these bars in an airtight container in the fridge for up to 5 days. For longer storage, freeze them for up to 3 months. Make sure they’re wrapped tightly in plastic wrap and in a freezer-safe container.
Can I substitute the graham cracker crust with another type of crust?
Yes! Try digestive biscuits, almond meal, or gluten-free cookie crumbs for different tastes. Make sure the substitute is crumbly and goes well with the lemon cheesecake.
What are some common mistakes to avoid when making these bars?
Avoid overmixing the cheesecake batter to prevent cracks. Don’t mix ingredients that are too cold. And don’t overbake. Use the “jiggle test” to check if they’re done.
Can I use bottled lemon juice instead of fresh lemons?
Bottled lemon juice works, but fresh lemons give a brighter, more complex flavor. Fresh lemons make your Lemon Marbled Cheesecake Bars taste better.
How can I create perfect marbling in the bars?
To get beautiful marbling, gently swirl lemon curd into the cheesecake with a toothpick or knife. Use light, circular motions. This creates delicate patterns without mixing too much.
Are these bars suitable for people with dietary restrictions?
The original recipe has dairy and gluten. But you can make it gluten-free and dairy-free by using special ingredients. Always check the labels.
What are some creative serving suggestions?
Top your bars with fresh berries, whipped cream, lemon zest, or powdered sugar. Serve with chamomile tea or a crisp white wine for a fancy dessert.
Can I make these bars in advance?
Yes! These bars are perfect for making ahead. Prepare them 1-2 days before, then store them in the fridge. This lets the flavors get even better.
Free Body Calculator – Know Your Body
Wondering if your body is in a healthy range? Use our Free Body Calculator to find out if you’re fit, normal, or need a lifestyle change. Get personalized tips, calorie targets, and your ideal protein, carbs, and fat intake – all in seconds.
Try Free Body Calculator Now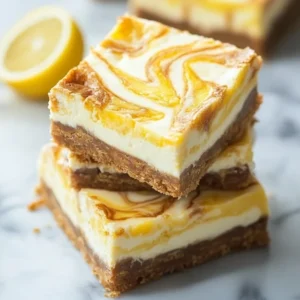
Easy Lemon Marbled Cheesecake Bars – A Refreshing Treat
Ingredients
- For the Crust:
- 1 ½ cups graham cracker crumbs about 12 crackers
- ¼ cup granulated sugar
- 6 tablespoons unsalted butter melted
- For the Cheesecake Filling:
- 16 oz 2 blocks cream cheese, softened
- ½ cup granulated sugar
- 2 large eggs
- 1 teaspoon vanilla extract
- ½ cup sour cream
- 1 tablespoon lemon zest from 1 lemon
- 2 tablespoons fresh lemon juice
- For the Lemon Swirl:
- ½ cup lemon curd store-bought or homemade

Instructions
- Make the Crust:
- Preheat oven to 325°F (163°C). Line an 8×8-inch baking pan with parchment paper, leaving overhang for easy removal.
- In a bowl, mix graham cracker crumbs, sugar, and melted butter until combined.
- Press mixture firmly into the bottom of the prepared pan. Bake for 8 minutes, then let cool slightly.
- Make the Cheesecake Filling:
- In a large bowl, beat cream cheese and sugar until smooth.
- Add eggs, vanilla, sour cream, lemon zest, and lemon juice. Mix until creamy and well combined.
- Assemble And Swirl:
- Pour the cheesecake mixture over the cooled crust, spreading evenly.
- Drop spoonfuls of lemon curd on top of the cheesecake batter. Use a toothpick or knife to swirl it into a marbled pattern.
- Bake And Chill:
- Bake for 30-35 minutes, or until the center is set but slightly jiggly.
- Let cool at room temperature for 1 hour, then refrigerate for at least 3 hours (or overnight) before slicing.
- Serve And Enjoy:
- Slice into bars and enjoy! Garnish with whipped cream, lemon zest, or powdered sugar if desired.
Notes
- Make It Extra Lemony: Add an extra ½ tablespoon lemon zest to the filling.
- Storage: Store bars in an airtight container in the fridge for up to 5 days.
- Freezing: Wrap individual bars and freeze for up to 2 months. Thaw overnight in the fridge before serving.
- Crust Alternative: Swap graham crackers for vanilla wafers or shortbread cookies for a twist.