
As autumn leaves dance outside my kitchen window, the aroma of a freshly baked apple crisp fills the air. It turns my home into a warm sanctuary of comfort. This quintessential fall favorite isn’t just a dessert it’s a nostalgic journey.
It connects us to cherished memories of family gatherings and cozy afternoons. Apple crisp represents more than just a sweet treat. It’s a culinary embrace that captures the essence of autumn’s bounty.
The combination of tender, spiced apples and a golden, crumbly oat topping creates a dessert that speaks directly to your soul. It invites you to slow down and savor each delectable bite.
Whether you’re an experienced baker or a kitchen novice, this apple crisp recipe will guide you. It will help you create a dessert that’s both simple to prepare and incredibly delightful. Get ready to discover why this dish has become a beloved autumn tradition in kitchens across the United States.
Key Takeaways
- Apple crisp is the ultimate fall comfort dessert
- Simple ingredients create an extraordinary flavor experience
- Perfect for family gatherings and cozy afternoons
- Easily adaptable for various dietary preferences
- Combines classic autumn flavors with homemade warmth
Why Apple Crisp is the Ultimate Autumn Comfort Food
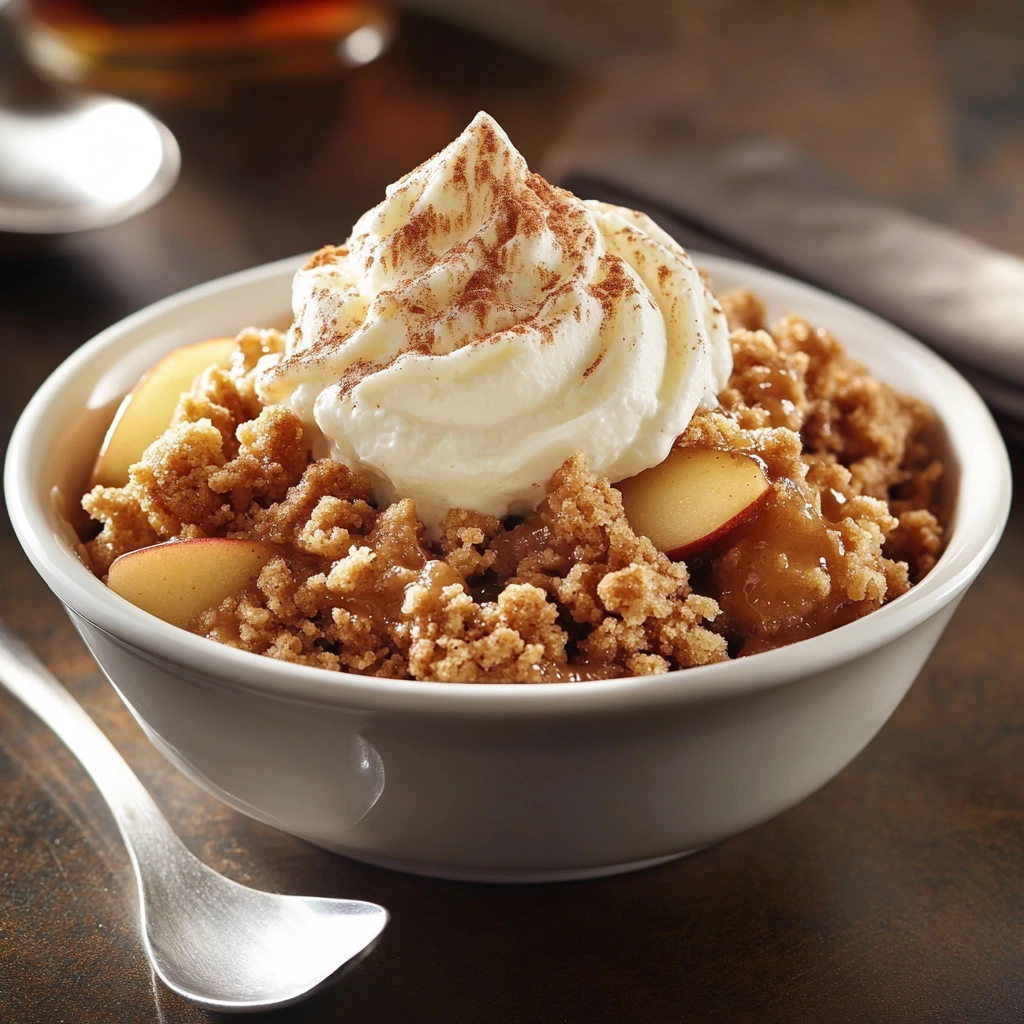
A warm apple crisp dessert served in a rustic bowl, topped with a scoop of creamy vanilla ice cream, surrounded by autumn leaves and cinnamon sticks, with golden-brown crisp topping glistening, evoking cozy fall vibes.
As autumn leaves fall and the air gets cooler, nothing beats a warm apple crisp. This comfort food has been a favorite in American kitchens for years. It brings families together with its amazing smell and classic taste.
Origins of a Grandma’s Classic
The apple crisp comes from early American settlers who wanted simple, tasty desserts. Your grandma’s recipe likely started from these beginnings. It turned basic ingredients into a dish that touches the heart of home cooking.
- Originated in early American farmhouse kitchens
- Created as a resourceful way to use abundant apple harvests
- Developed during times of limited baking resources
What Sets Apple Crisp Apart
Apple crisp is different from apple pie because of its texture. The streusel topping is crumbly and buttery, while the apples are soft and spiced. Unlike pie, which needs a complex crust, apple crisp is easy to make but full of flavor.
Enjoying apple crisp is essential for a true autumn dessert experience. It captures the season’s spirit in every delicious bite.
Essential Ingredients for the Perfect Apple Crisp
A rustic wooden table adorned with a variety of fresh ingredients for apple crisp, including vibrant red and green apples, a bowl of rolled oats, a container of brown sugar, a stick of unsalted butter, ground cinnamon, nutmeg, and flour. Scatter some chopped nuts and a few vanilla beans around, with a backdrop of autumn leaves and soft natural lighting filtering through.
Making a great apple crisp starts with the right ingredients. This easy recipe needs a few key parts to turn simple items into a tasty autumn treat.
The base of a fantastic apple crisp is top-notch ingredients. You’ll need fresh apples, flour, sugar, butter, and warm spices. These are the basics for this classic dessert.
Key Ingredients Breakdown
- Apples: Pick firm, tart apples like Granny Smith or Honeycrisp
- Flour: Use all-purpose or gluten-free options
- Sugar: Brown and white sugar for flavor
- Butter: Unsalted, cold, and high-quality butter
- Spices: Cinnamon, nutmeg, and optional vanilla extract
| Ingredient | Quantity | Purpose |
|---|---|---|
| Apples | 6-8 medium | Provides fruit base and natural sweetness |
| All-Purpose Flour | 1 cup | Creates crisp topping texture |
| Brown Sugar | 3/4 cup | Adds caramel-like sweetness |
| Butter | 1/2 cup | Brings richness and helps bind ingredients |
When making this easy recipe, focus on quality and measurement. Each part is key to the perfect flavor balance in your dessert.
Pro tip: Use room temperature ingredients for smoother blending. This ensures a delightful apple crisp that will wow everyone.
Selecting the Best Apples for Your Crisp
Choosing the right apples can make your apple crisp amazing. Not all apples are good for baking. You need to pick ones that taste great and feel right.
Each apple variety adds something special to your treat. Some apples stay firm, while others get soft and creamy.
Sweet vs. Tart Apple Varieties
The type of apple you pick changes how your crisp tastes. Here’s a list of top baking apples:
- Sweet Varieties: Fuji, Gala, and Golden Delicious are sweet
- Tart Varieties: Granny Smith and Braeburn are tangy
- Balanced Varieties: Honeycrisp and Pink Lady mix sweet and tart
Seasonal Apple Picking Guide
Here are tips for picking apples for your crisp:
- Choose firm apples with no bruises or soft spots
- Pick apples in peak season (usually September-October)
- Go for local, fresh apples for the best taste
Storage Tips for Baking Apples
| Storage Method | Duration | Best Conditions |
|---|---|---|
| Refrigerator | 4-6 weeks | Crisper drawer, high humidity |
| Cool, Dark Pantry | 1-2 weeks | Away from direct sunlight |
| Room Temperature | 3-5 days | Away from other ripening fruits |
Follow these tips to keep your apples fresh and tasty. The right apple makes your apple crisp unforgettable.
Creating the Perfect Oat Streusel Topping
The oat streusel topping is the star of any apple crisp. It turns a simple dessert into a masterpiece. To get it just right, you need the right ingredients and technique.
To make an amazing oat streusel, focus on a few things:
- High-quality rolled oats
- Unsalted butter at the right temperature
- A mix of brown and white sugars
- A pinch of salt for flavor
The secret to a great oat streusel is in how you mix it. Use your fingers to mix the ingredients. This creates a crumbly texture that turns golden and crispy in the oven. Cold butter is best for this, as it makes the crumbs irregular and crunchy.
Want to make your oat streusel even better? Try these:
- Chopped nuts like pecans or almonds
- A sprinkle of cinnamon
- A touch of vanilla extract
- Dash of nutmeg for warmth
Your oat streusel should be sandy and crumbly. It will turn into a crispy, golden-brown topping when baked. The goal is to not overmix. You want uneven chunks for texture and looks.
Pro tip: If your oat streusel is too dry, add a bit more melted butter. If it’s too wet, add a little more flour or oats. This will get the texture just right.
Step-by-Step Apple Crisp Preparation Guide
Making the perfect apple crisp needs careful steps and attention. Your apple crisp will be a warm treat for any gathering. Let’s go through the steps to make a delicious dessert.
Preparing the Apple Filling
Choosing and preparing your apples is key for a great fruit crumble. Here’s what to do:
- Choose 6-8 medium-sized apples (Granny Smith or Honeycrisp work best)
- Wash and peel apples completely
- Core and slice apples into uniform 1/4-inch thick pieces
- Toss apple slices with lemon juice to prevent browning
Mixing the Crumb Topping
The crumb topping makes your fruit crumble crispy. Here’s how to make it:
- Combine 1 cup rolled oats with 1/2 cup brown sugar
- Add 1/2 cup all-purpose flour
- Mix in 1/2 cup cold butter pieces
- Use your fingers to create a crumbly texture
Assembly and Baking Tips
Assembling your fruit crumble needs some expert tips:
| Step | Technique |
|---|---|
| Layering | Spread apple slices evenly in a 9×13 inch baking dish |
| Topping | Sprinkle crumb mixture uniformly over apples |
| Baking | Bake at 375°F for 45-50 minutes until golden brown |
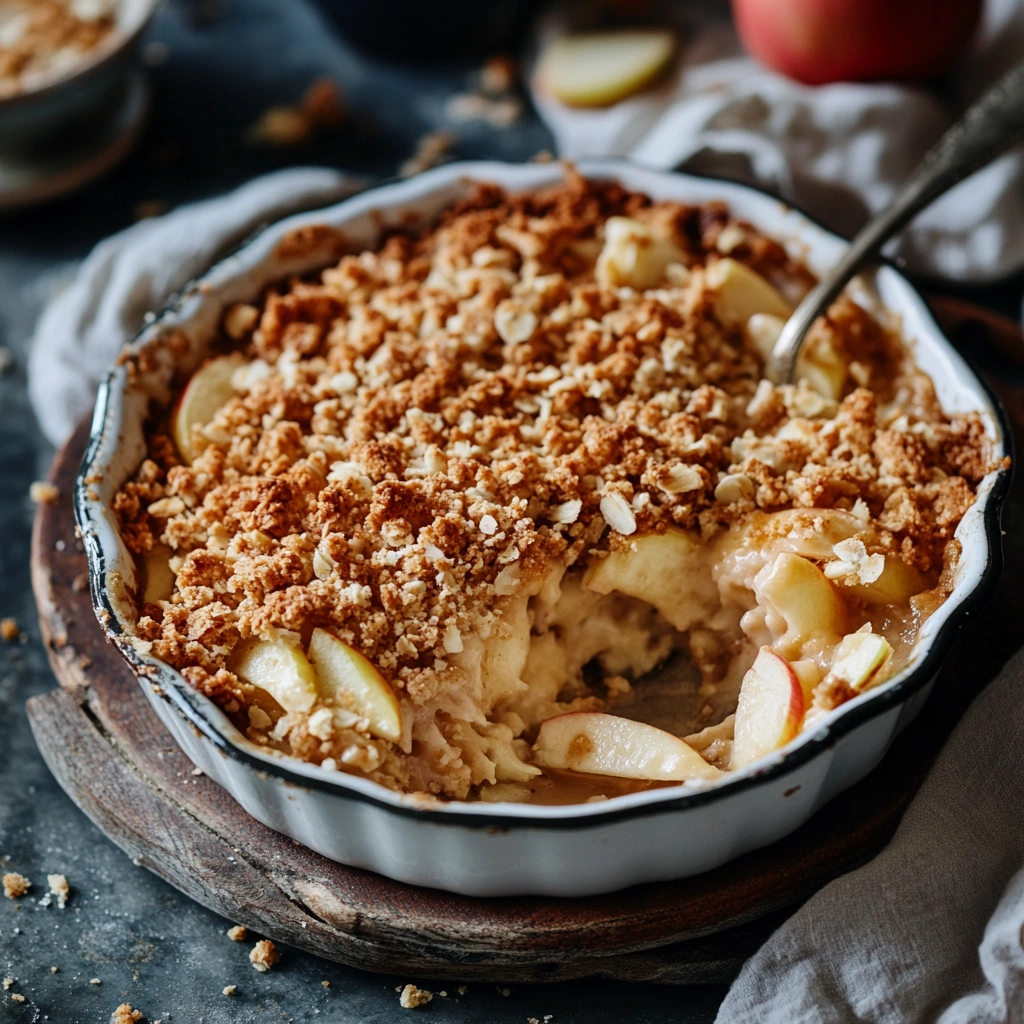
Your fruit crumble is now ready to impress! The secret is balancing tender apples with a crispy topping. Serve warm for the best taste.
Secret Tips for a Crunchy Cinnamon Topping
Creating the perfect cinnamon topping can make your apple crisp amazing. It’s all about finding the right mix of ingredients and techniques for that perfect crunch.
Your cinnamon topping needs to be just right in texture and taste. Cold butter is essential for those crispy, flaky bits that make the topping unforgettable.
- Use unsalted butter straight from the refrigerator
- Mix in fresh ground cinnamon for maximum flavor
- Add a pinch of sea salt to enhance sweetness
- Incorporate rolled oats for extra crunch
Temperature is key for the perfect cinnamon topping. Baking at the right temperature makes it golden and crisp without burning.
| Ingredient | Purpose | Recommended Quantity |
|---|---|---|
| Cold Butter | Creates Flaky Texture | 1/2 cup |
| Ground Cinnamon | Adds Warm Flavor | 2 tablespoons |
| Brown Sugar | Increases Crunchiness | 1/3 cup |
Pro tip: Chill your cinnamon topping mix for 15 minutes before adding it to the apples. This step helps get those crispy, golden-brown bits that make your apple crisp irresistible.
Serving Suggestions and Pairings
Your freshly baked apple crisp deserves the perfect presentation. The right serving approach can turn this classic dessert into an unforgettable experience. It will delight all your senses.
Perfect Temperature and Timing
The ideal temperature for serving apple crisp can greatly affect taste and texture. Here are some tips:
- Serve warm (around 15 minutes after removing from oven) for maximum flavor
- Room temperature works well for picnics and potlucks
- Slightly heated leftovers can revive the crisp’s original magic
Complementary Toppings and Sides
Elevate your apple crisp with these delightful accompaniments:
- Classic Vanilla Ice Cream: Creates a perfect temperature contrast
- Whipped cream for added richness
- Caramel drizzle for extra sweetness
Beverage pairings can enhance your apple crisp experience. Consider serving with:
- Warm apple cider
- Chai tea
- Light dessert wine
Your apple crisp can become a memorable dessert with these thoughtful serving suggestions. Experiment and find your perfect combination!
Storage and Reheating Methods
Keeping your apple crisp fresh is key to enjoying it more than once. The right storage methods help keep the dessert’s flavors and topping crispy.
Refrigeration Guidelines
Your homemade apple crisp can last 4-5 days in the fridge. Use an airtight container to avoid a soggy streusel topping. Cover it with plastic wrap or foil to keep it fresh.
Freezing Your Apple Crisp
Freezing is great for keeping your apple crisp for longer. Here’s how to do it right:
- Let the apple crisp cool completely
- Wrap tightly in plastic wrap
- Place in a freezer-safe container
- Store for up to 3 months
Reheating Techniques
| Method | Temperature | Time | Result |
|---|---|---|---|
| Oven | 350°F | 15-20 minutes | Crispy topping, warm filling |
| Microwave | Medium power | 30-45 seconds | Quick warming, softer texture |
Pro tip: For the best results, take your apple crisp out of the fridge 15-20 minutes before reheating. This lets it warm up to room temperature.
Enjoy your delicious apple crisp, whether freshly baked or reheated with care!
Seasonal Variations and Adaptations
Your apple crisp can become a seasonal treat that everyone loves. Just make a few changes to make it versatile. It can fit different tastes and diets.
Trying new variations keeps your dessert exciting. It lets you play with flavors and ingredients. Apple crisp is great because it’s flexible and can surprise your guests.
Crafting a Gluten-Free Delight
Making a gluten-free apple crisp is simple. Here are some easy swaps:
- Replace traditional flour with almond flour
- Use gluten-free rolled oats for the topping
- Swap wheat-based ingredients with certified gluten-free alternatives
Adjusting Sweetness Levels
Adjusting the sweetness of your dessert is easy. It lets you please different tastes and health needs. Here’s how to do it:
- Use alternative sweeteners like stevia or monk fruit
- Reduce sugar quantities gradually
- Incorporate naturally sweet fruits to enhance flavor
By trying new ingredients and methods, you can make a tasty apple crisp. It will meet many dietary needs while still being comforting.
Troubleshooting Common Apple Crisp Issues
Making the perfect apple crisp can be tricky. Knowing common problems helps you make a tasty dessert every time.
Common Apple Crisp Problems and Solutions
- Soggy Streusel ToppingTo avoid a soggy topping, mix your crumb mixture well and chill it before baking. Use cold butter and don’t overmix. This keeps your topping crisp.
- Undercooked ApplesMake sure to slice apples evenly and pick ones that stay firm. Pre-cooking firmer apples can help them cook just right.
- Overly Browned ToppingIf your streusel browns too fast, cover your apple crisp with foil. This keeps the topping from burning while the apples cook fully.
Diagnostic Baking Chart
| Issue | Possible Cause | Solution |
|---|---|---|
| Watery Filling | Too much liquid | Reduce sugar or add cornstarch |
| Dry Topping | Insufficient butter | Increase butter quantity |
| Uneven Baking | Inconsistent apple slices | Cut apples to uniform thickness |
Remember, practice makes perfect with any baked dessert. Each apple crisp you make will get better, helping you master this classic autumn treat.
Conclusion
Apple crisp is more than a dessert; it’s a comfort food that warms your kitchen and heart. In this guide, you learned how to make a delicious autumn treat. It turns simple ingredients into a memorable dish.
Learning about apple crisp shows how versatile and easy it is to make. You can pick the best apples and make a crumbly streusel topping. Now, you can make a dessert that will wow your family and friends. Every batch lets you try new things and find your own style.
Baking apple crisp is a way to bond with loved ones and make memories. It’s perfect for both new and experienced bakers. Apple crisp is special because it’s simple yet fills you with feelings of home and comfort.
As autumn comes, make apple crisp a special tradition in your home. Get your ingredients ready, preheat the oven, and enjoy the amazing smell of baked apples and spices. Your apple crisp journey is starting!
Free Body Calculator – Know Your Body
Wondering if your body is in a healthy range? Use our Free Body Calculator to find out if you’re fit, normal, or need a lifestyle change. Get personalized tips, calorie targets, and your ideal protein, carbs, and fat intake – all in seconds.
Try Free Body Calculator Now
How to Make the Best Apple Crisp with a Buttery Topping
Ingredients
- For the Apple Filling:
- 5 cups apples peeled and sliced (Granny Smith, Honeycrisp, or Fuji)
- 1/3 cup granulated sugar
- 1 tbsp lemon juice
- 1 tsp cinnamon
- 1/4 tsp nutmeg
- 1 tsp vanilla extract
- 1 tbsp cornstarch for thickening
- For the Crisp Topping:
- 1/2 cup old-fashioned oats
- 1/2 cup all-purpose flour
- 1/3 cup brown sugar
- 1/4 cup granulated sugar
- 1/2 tsp cinnamon
- 1/4 tsp salt
- 1/2 cup unsalted butter melted

Instructions
- Prepare the Apple Filling:
- Preheat oven to 350°F (175°C) and grease a 9×9-inch baking dish.
- In a large bowl, toss sliced apples with sugar, lemon juice, cinnamon, nutmeg, vanilla extract, and cornstarch.
- Spread the apple mixture evenly in the greased baking dish.
- Make the Crisp Topping:
- In a separate bowl, combine oats, flour, brown sugar, granulated sugar, cinnamon, and salt.
- Pour in melted butter and mix until the topping becomes crumbly.
- Assemble and Bake:
- Sprinkle the crumble topping evenly over the apples.
- Bake for 35-40 minutes, until the apples are bubbly and the topping is golden brown.
- Serve:
- Let cool for 5-10 minutes, then serve warm with vanilla ice cream or whipped cream.
Notes
- Make It Gluten-Free: Use almond flour or a gluten-free flour blend.
- Make It Vegan: Use coconut oil or vegan butter instead of butter.
- Storage: Store in an airtight container in the fridge for up to 4 days. Reheat in the oven or microwave before serving.